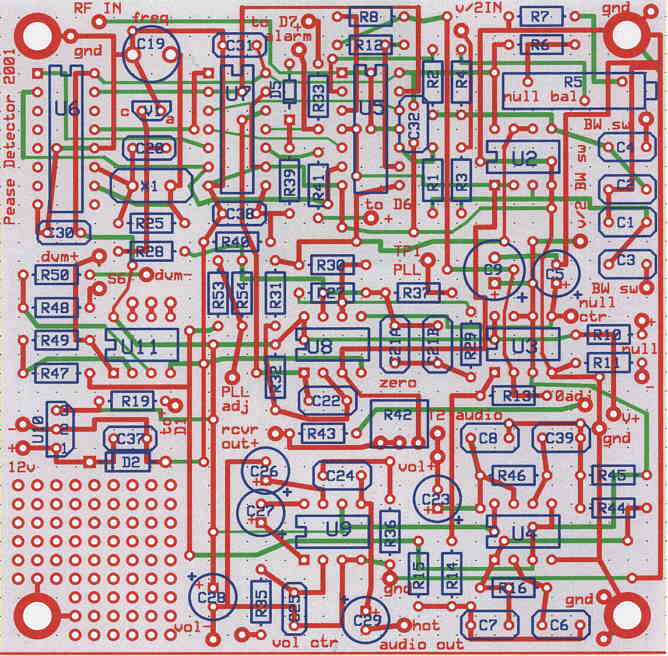
NOTES: The actual board is 3.5" square. All 4 corners should be grounded to the minibox thru metal standoffs.
"12v" in the lower left is a misprint. It should just say "Bat in".
Two known gaps in traces on the top layer should have been repaired before
you received the board. They
are (1) between R31 and R32; and (2) between U2-pin1 and U8-pin3.
The metal crystal case must be raised above the board to avoid shorting out the traces that run under it!
Trimmer C19 has its metal adjusting screw connected to one lead (which shou;ld be grounded).
The DVM derives its power from the regulated +12V on this board. Use a
3.0 or 3.3V zener in series to brovide
~9V for the DVM.
The receiver must be nulled before first use. While using headphones,
set the RF both RF amp controls to Lo gain
to get rid of RF amp Noise. Presetting both null controls to the center
of their ranges beforehand will help.
Alternately adjust the two null controls (R5 and R9) for a perfect audio
null, turning up the volume control as the null
improves until only noise is heard. The front panel null control will need
adjustment from time to time (using low RF
gain with no loop as before). The internal null adjust should only need
adjustment after large changes in temperature
(also for changes in battery voltage with the simplified receiver).
The completed receiver must be tuned very close to the frequency of your
beacon in order to phaselock properly
and give a steady DVM readout of signal strength. While receiving the Beacon
signal from ~30m away, slowly
tune C19 while watching the green phaselock LED, which will be blinking
slowly on and off. Tune until the blinking
becomes slower and finally stops with the LED ON. Now switch the DVM to
"PLL Adjust" and continue trimming
until the DVM reading is as close to zero as possible, hopefully under
100.